The Maestro dashboard allows you to house sites with the following levels of access:
- For sites hosted on RCS: You can be granted access to both the WP Admin and the cPanel, or just WP Admin.
- For sites hosted elsewhere: You can only be granted WP Admin access.
It’s likely that you either created a separate hosting account for each site you currently manage on RCS or with any other hosting provider. You either created a separate hosting account yourself, or your clients purchased the hosting and shared their account credentials with you.
To safeguard the security of each account holder, we require that you be authorized to access a WordPress site through your Maestro account. This can be done in two ways:
- Secure Link: This mode of authorization is for websites hosted on RCS
- Manage Hosting & WP-Admin link: This will provide you access to the client's RCS hosting account and WP Admin panel of the website.
- WP Admin Only link: This will provide you access to the WP Admin panel of the website.
- Secret Key: This mode of authorization will provide you with access to the WP Admin panel of websites hosted Elsewhere
Read on to understand how it works:
- How to Add and an Existing Website
- Add a WordPress site under the client using Secure Link
- Add a WordPress site under the client using Secret Key
- How to manage updates for your sites
- How to create collections
- How to track broken links for your sites
- How to create invoices for your clients
How to Add and Existing Websites
You can add an existing website site in two ways:
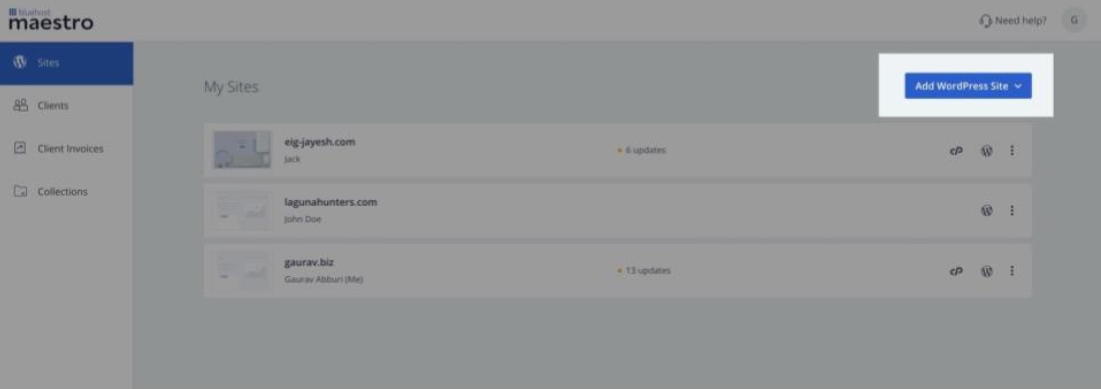
- From the dashboard directly, click on Add WordPress Site.
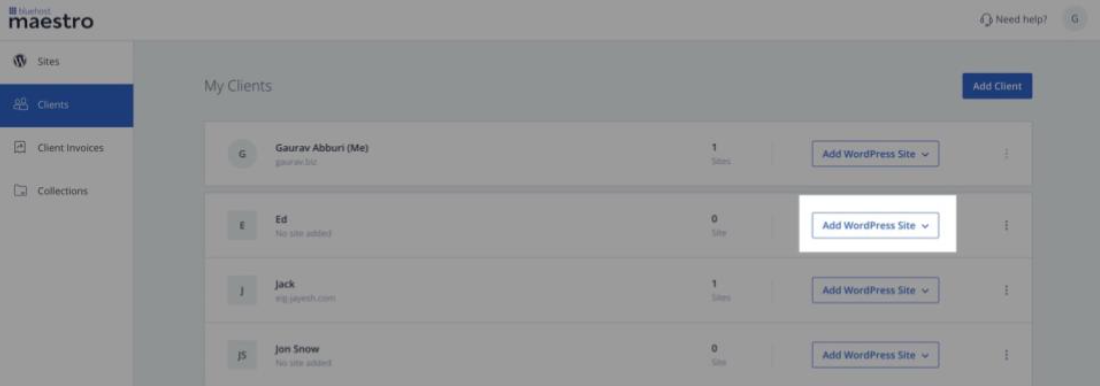
- From the client’s details view - Click on Add WordPress Site for the client you wish to add to this site.>
- To start the process, you can click on Add WordPress Site on the top left side of the panel.
- You can click on Add an existing site to initiate the process.
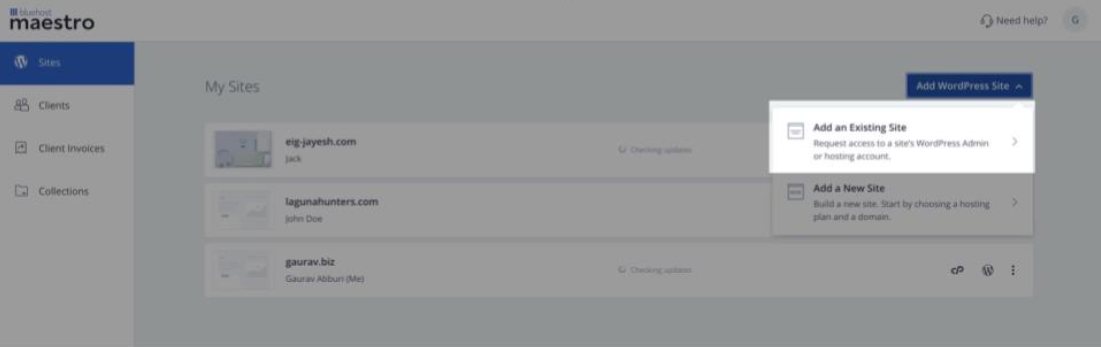
- You have two options to add a WordPress Site:
- Add an Existing Site - This option is for adding an already existing site.
- Add a New Site - This option will initiate the purchase flow, where you can buy a new hosting package and set up a site from scratch.
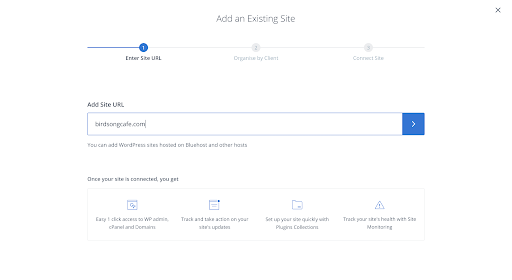
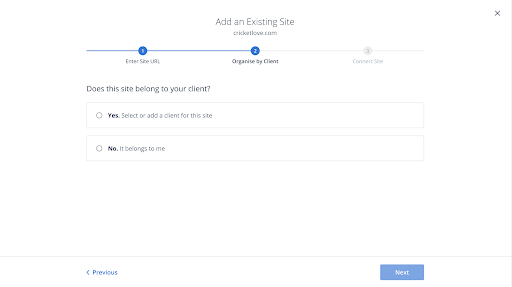
On clicking Add an existing Site, you will be asked to enter the site’s URL. After entering the site’s URL, click on enter, which is represented by the arrow (>).
Once you successfully enter the URL, you will have to assign the website based on whom it belongs. You should choose:
- Yes. Select or add a client for this site: By clicking this, you will have to either add a new client or choose an existing client added to your Maestro dashboard.
- No. It belongs to me: By clicking on “Me,” the website will be assigned to you on the Maestro dashboard.
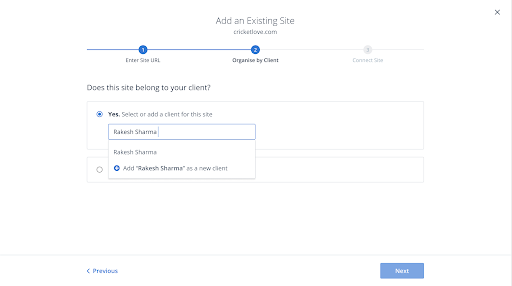
By clicking on Yes. Select or add a client for this site, you will have to either add a new client or choose an existing client added to your Maestro dashboard.
Connect a WordPress site under the client using Secure Link
Get securely authorized to access the site’s hosting and WP admin.
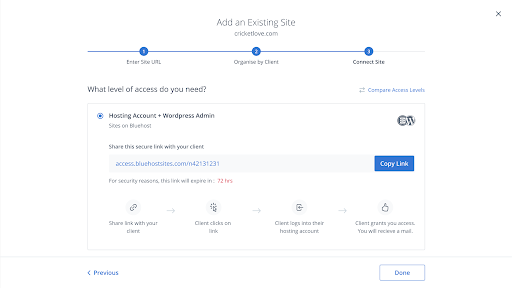
Copy & Share the “secure link” with your RCS client for approval so that you may get access to their hosting account and WordPress site’s WP Admin.
For security reasons, this link will be active for 72 hours. On accessing this link, your client will be required to log in to their RCS hosting account, where they will see a request made by you. To help them identify you, your Name and registered email of your Maestro account will be shown to them. Here, they can either approve or reject your request.
- Once you enter the site’s URL & select the client, you will have to select from the following levels of access:
- Hosting Account + WordPress Admin Access
- WordPress Admin Only
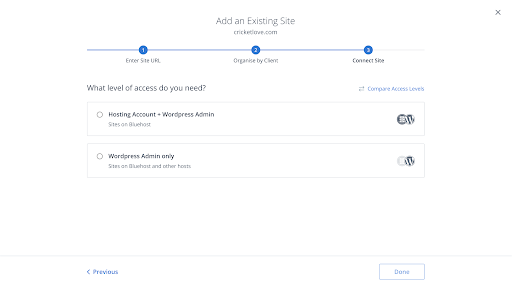
- When you select the “Hosting account + WordPress admin” option, you can go ahead and click on Generate Secure Link.
.png)
- By clicking on Generate Secure Link, a secure link will automatically appear with a Copy Link Option.
- This is what they will see upon successful login, and if the site belongs to their RCS account:
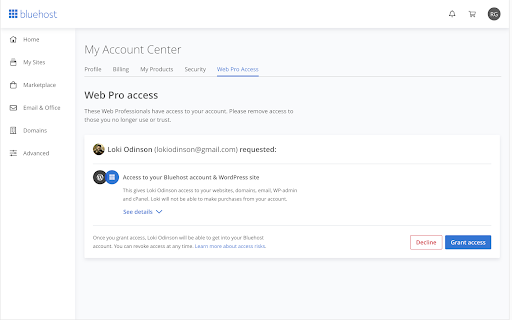
If your client does not accept your request in 72 hours, you can always re-generate the link from your Maestro dashboard.
Get securely authorized to access the site’s WP admin only.
- Once you enter the site’s URL & select the client, you will have to select from the following levels of access:
- Hosting Account + WordPress Admin Access
- WordPress Admin Only
- Select “WordPress Admin only” for the level of access and choose a site on RCS.
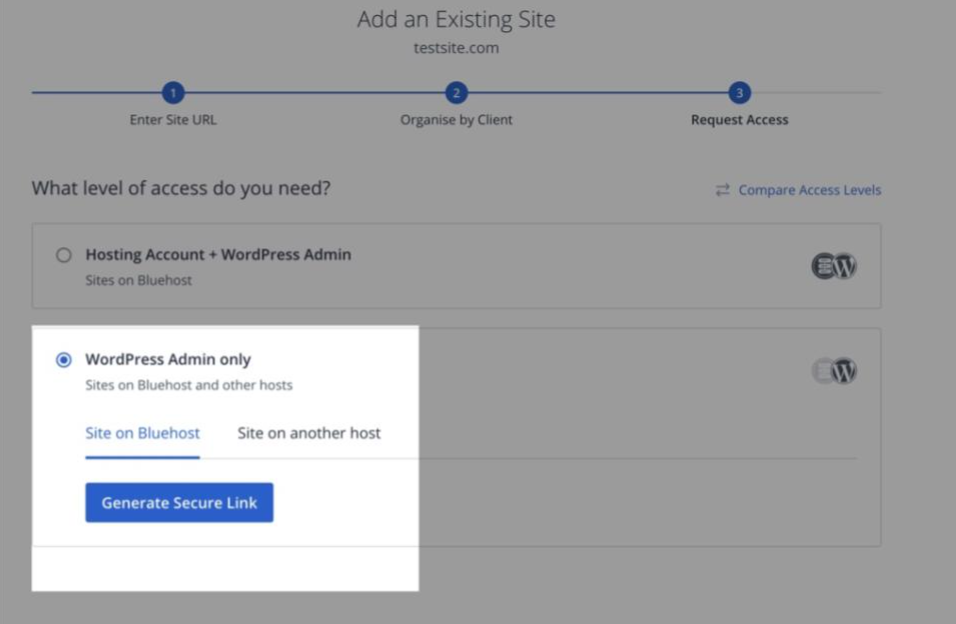
- Click on Generate Secure Link to generate a link that can be shared with your client.
- Copy & Share the secure link with your RCS client for approval so that you may get access to their hosting account and WordPress site’s WP Admin.
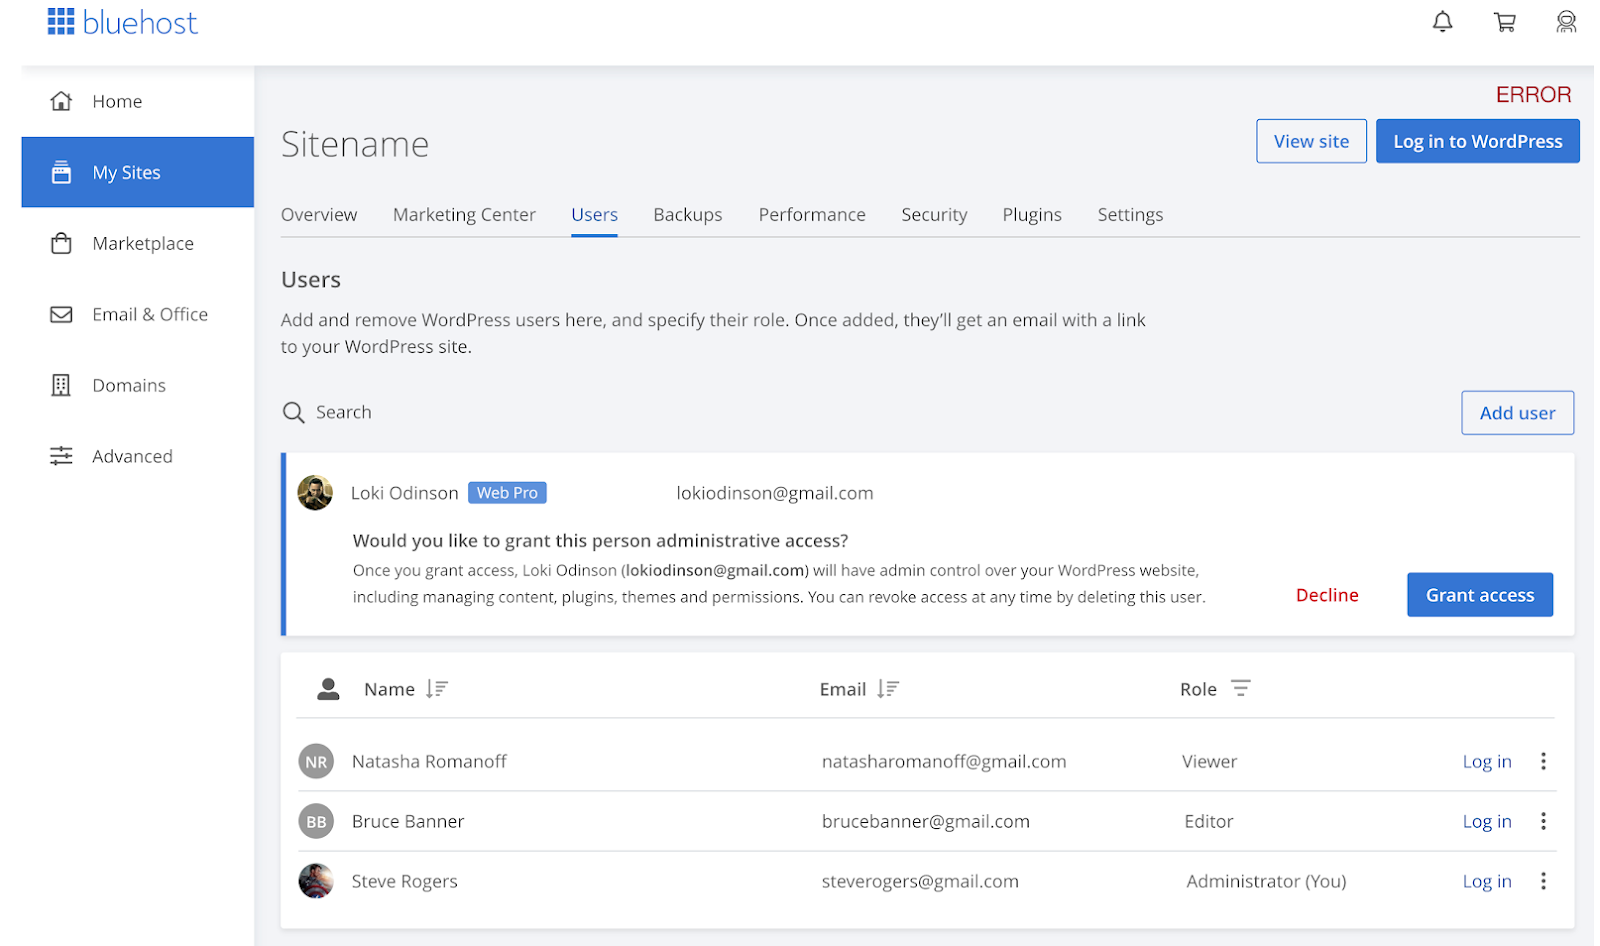
For security reasons, this link will be active for 72 hours. On accessing this link, your client will be required to log in to their RCS hosting account, where they will see a request made by you. To help them identify you, your Name and registered email of your Maestro account will be shown to them. Here, they can either approve or reject your request.
- This is what they will see upon successful login, and if the site belongs to their RCS account:
Add a WordPress site under the client using Secret Key
You can add an existing website site in two ways:
- From the dashboard directly - Click on Add WordPress Site.
- From the client’s details view - Click on the client name on the dashboard to get their details view. Here you can click on Add WordPress Site.
- You can click on Add an existing site to initiate the process.
- After typing in the site’s URL, click on enter, which is represented by the arrow (>).
- Once you successfully enter the URL, you will have to assign the website based on whom it belongs. You should choose:
- Yes. Select or add a client for this site: On clicking this, you will have to either add a new client or choose an existing client added to your Maestro dashboard.
- No. It belongs to me: On clicking on “Me,” the website will be assigned to you on the Maestro dashboard.
-
By clicking on Yes. Select or add a client for this site, you will have to either add a new client or choose an existing client added to your Maestro dashboard.
- Once you enter the site’s URL & select the client, you will have to select from the following levels of access:
- Hosting Account + WordPress Admin Access
- WordPress Admin Only
- Select WordPress Admin only for the level of access and choose a site on RCS
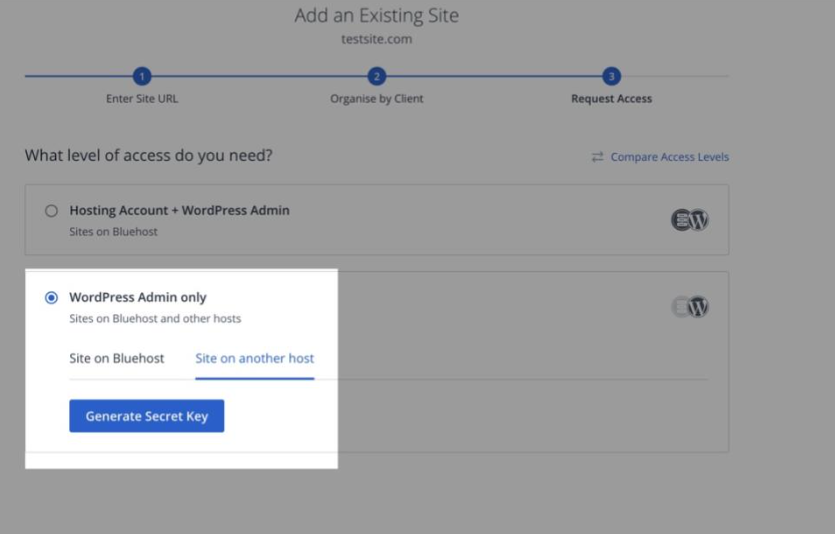
- Click on Generate Secret Key. A secret key will be generated.
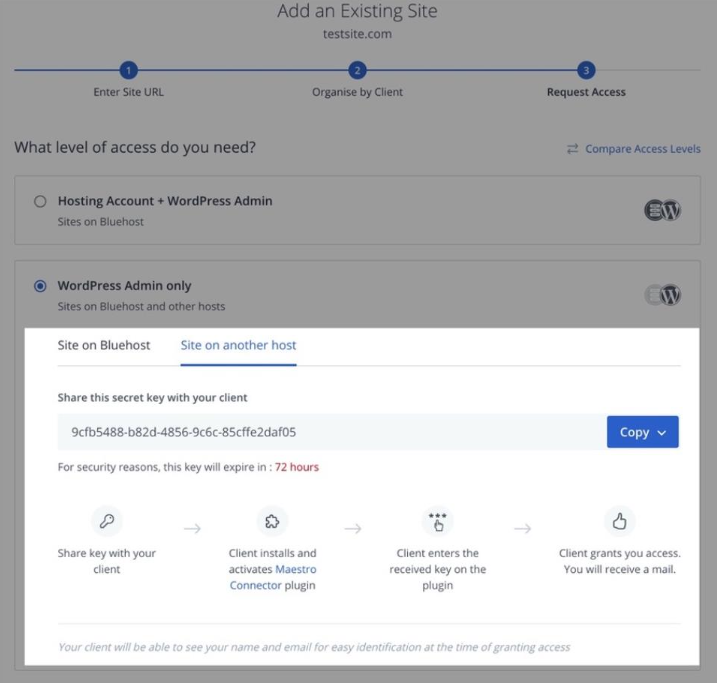
-
Copy & Share the “secret key” with your client for approval so that you may get access to their WordPress site’s WP Admin.
For security reasons, this secret key will be active for 72 hours. Your client will be required to log in to their WordPress Admin panel.
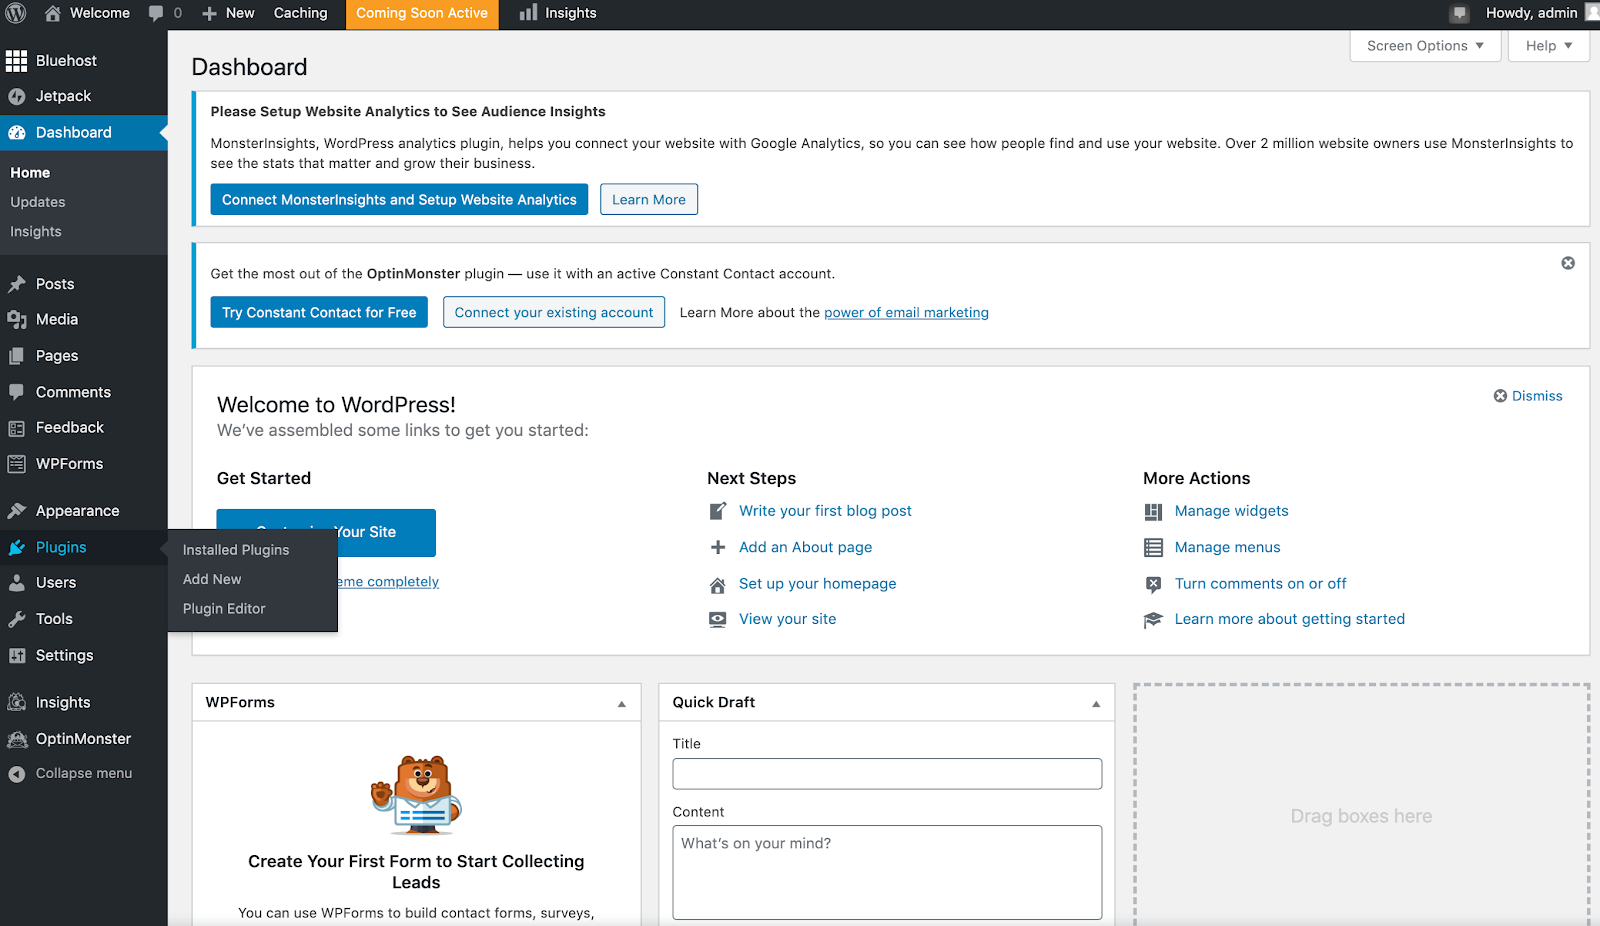
Your client will have to search for the “RCS Maestro Plugin” and install it.
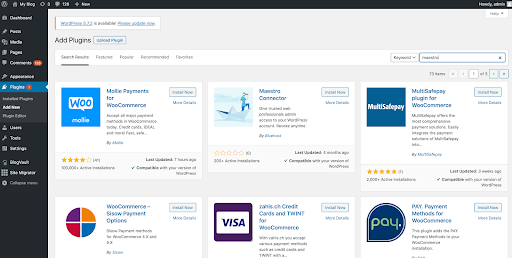
Once your client has installed the plugin, it needs to be activated by clicking on activate.
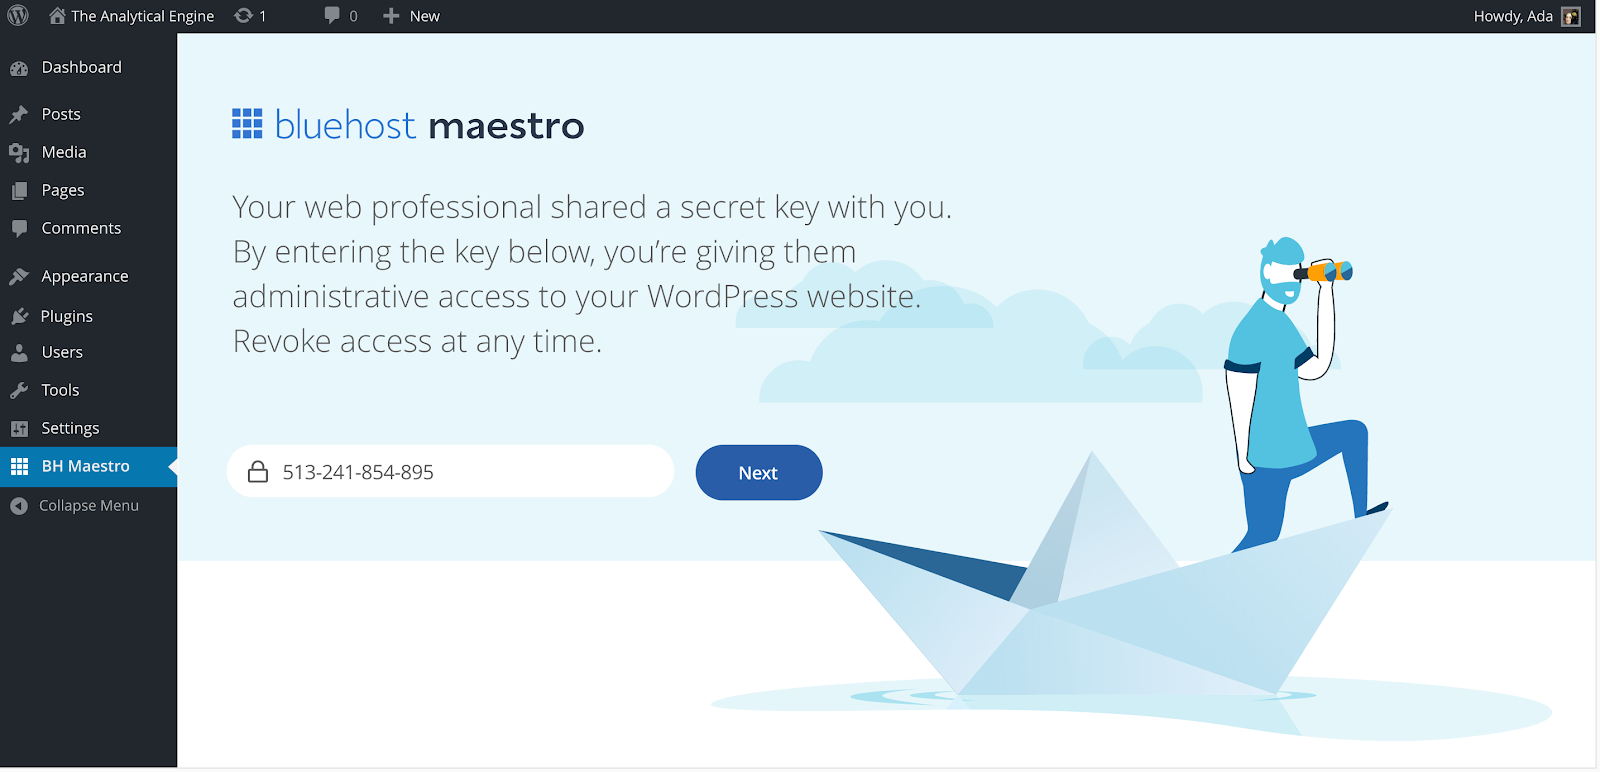
After activating the plugin, your client will be able to see a screen where the secret key needs to be entered.
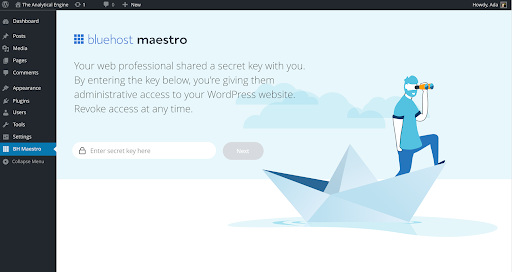
Your client should paste the secret key and click on “Next.”
This is what they will see after they click Next.
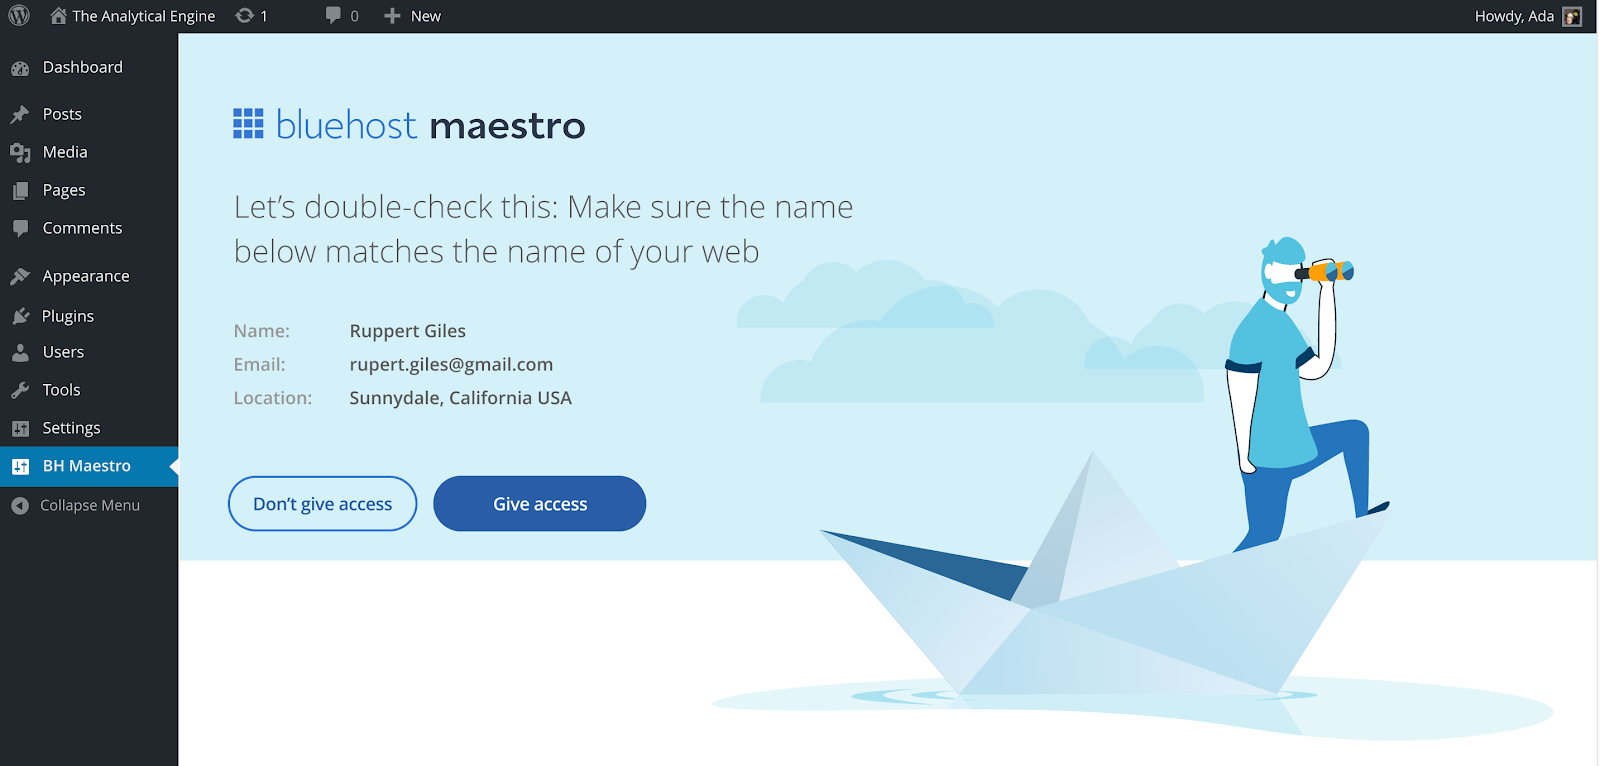
Your client has 72 hours to “Give access” to the website. However, if the access is not granted and the secret key has expired, you can always re-generate the secret key from your maestro dashboard.
If you need further assistance, feel free to contact us via Chat or Phone:
- Chat Support - While on our website, you should see a CHAT bubble in the bottom right-hand corner of the page. Click anywhere on the bubble to begin a chat session.
- Phone Support -
- US: 210-488-5907
- International: 210-488-5907
You may also refer to our Knowledge Base articles to help answer common questions and guide you through various setup, configuration, and troubleshooting steps.
