- Initiate Your Hosting Purchase
- Choosing for whom the hosting package is being purchased
- Choosing a hosting plan and a domain
- Choosing a Domain
- Making Payment
- Where can I manage my purchases?
- How do I renew my Hosting plan?
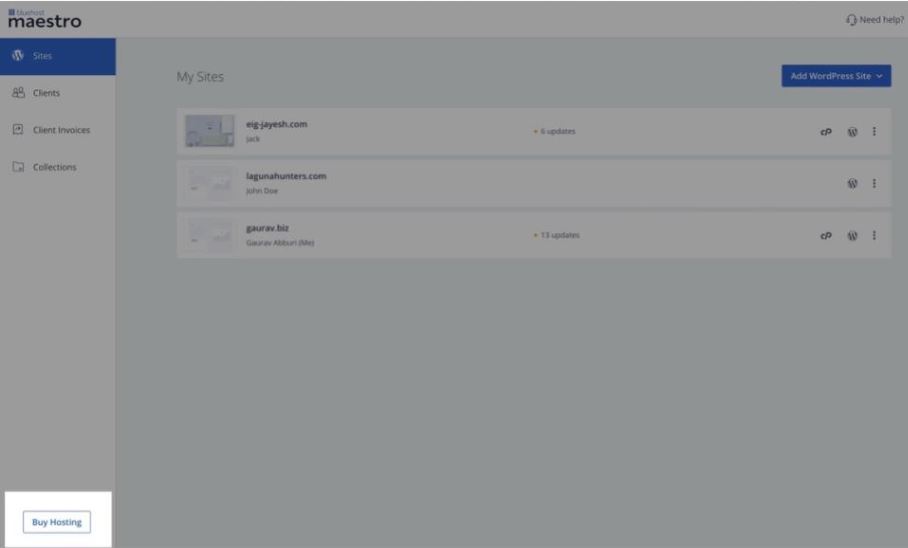
You can initiate your hosting purchase in the following ways
- By clicking on Buy Hosting at the bottom left corner of the page.
- Select the Add a new Site option when adding a WordPress site for a client.
Choosing for whom the hosting package is being purchased
If you are purchasing a new hosting package from Maestro, you can choose from the available options:
- For Myself - This option allows you to add a site to your dashboard for your personal use.
- For my client - This option allows you to add a site to your dashboard on behalf of your client.
For all practical purposes, the hosting package will be purchased by you and will have your personal information saved against it.
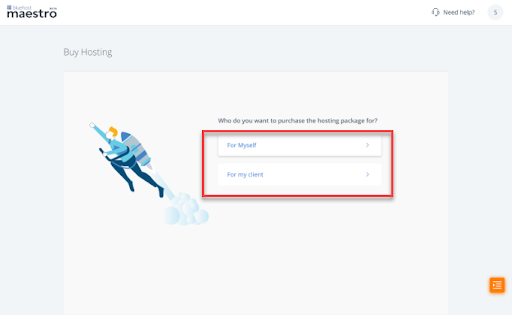
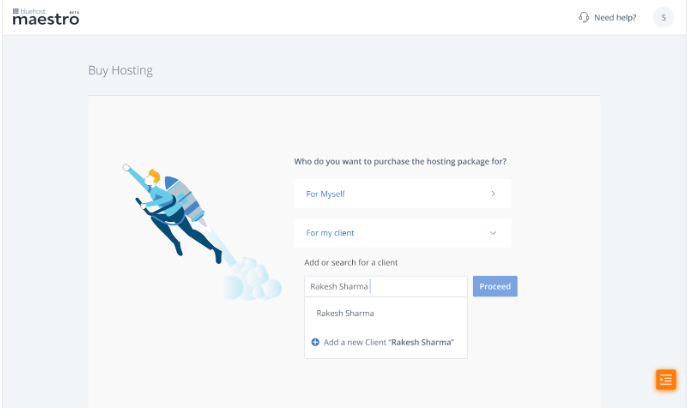
If you are purchasing the hosting account for your client, you can either create a new client or add it under an existing client.
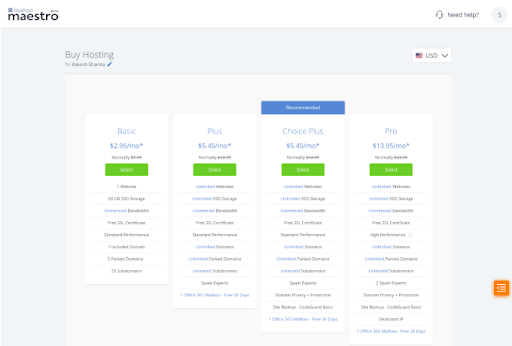
Choosing a hosting plan and a domain
You can choose a hosting plan that suits your requirement. Maestro currently offers only shared hosting plans.
Choosing a Domain
You can search for a new domain for your site. Or, if you already own one, you can skip this step. In such a case, your site will be assigned a temporary domain name.
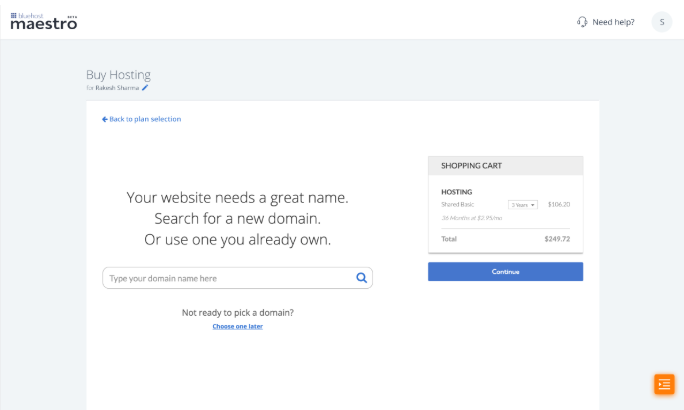
Making Payment
Choose a payment option and complete your payment.
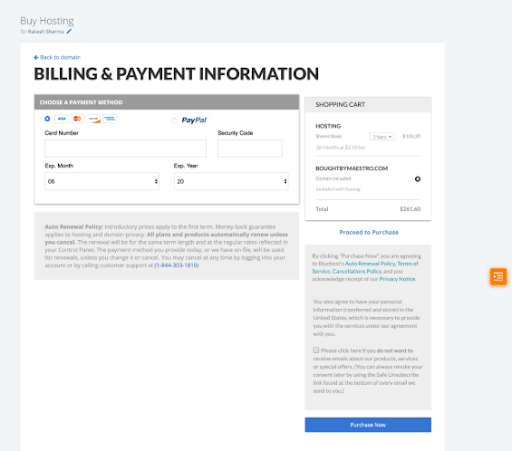
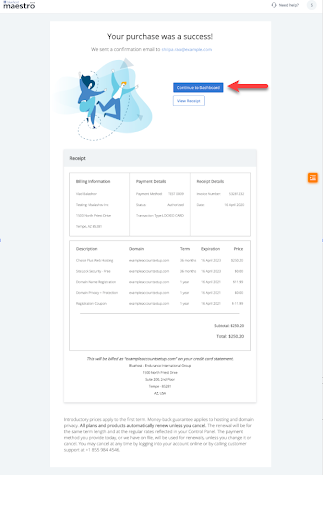
On successful payment, you will receive a payment confirmation with details of your purchase. You can start accessing this site in your Maestro dashboard by clicking on Continue to Dashboard.
When you click on Continue to Dashboard, you will be redirected to the client page with the newly added website along with the WP admin and hosting access enabled automatically.
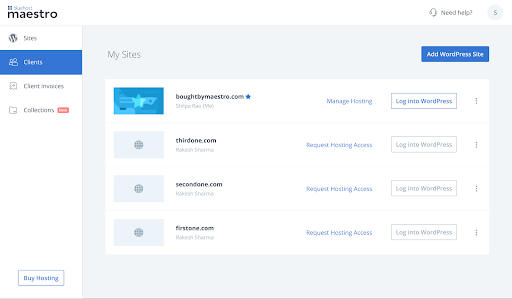
Note: The hosting and WP admin access takes 10-15 mins to set up.
Where can I manage my purchases?
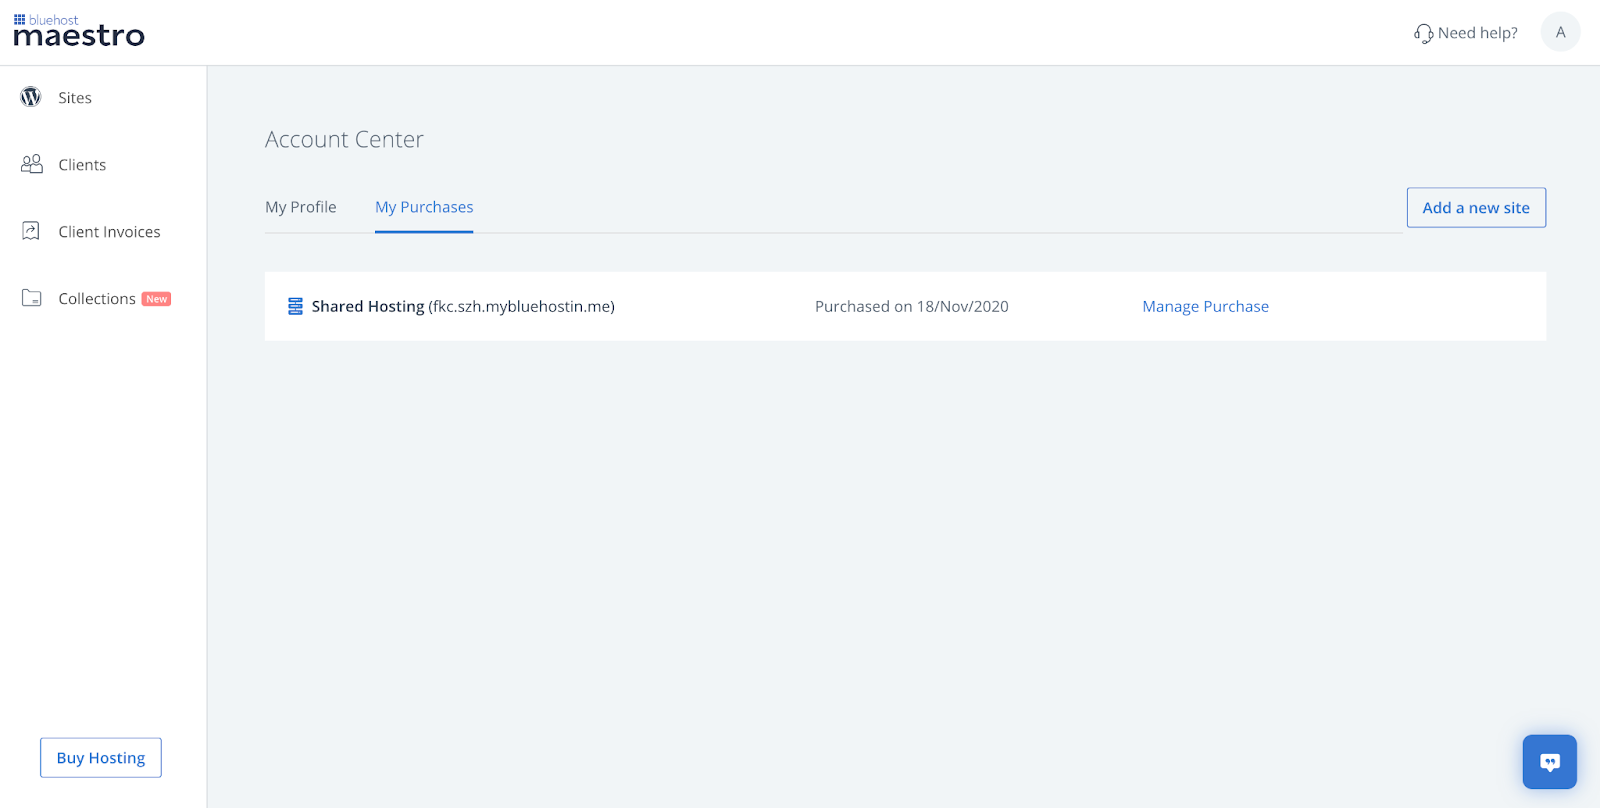
You can view details of all your hosting purchases from the purchases section in your Maestro dashboard.
Downloading the receipt for my purchase
- Click on the Manage Purchase of the hosting package you wish to download the receipt.
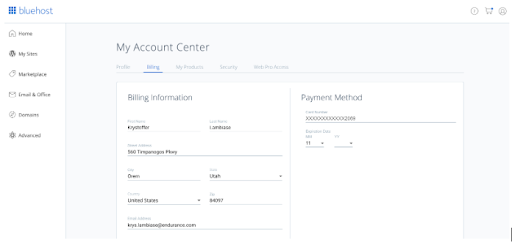
- Navigate to the Billing section to view all your receipts.
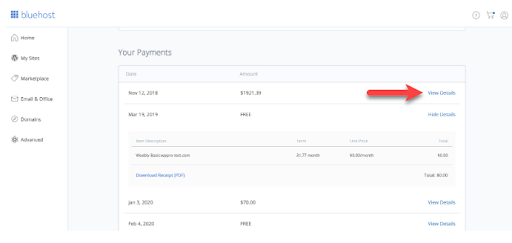
- Click on View Details and Download Receipt of your purchase.
How do I renew my Hosting plan?
Your hosting package is set to renew automatically 15 days prior to the expiration date. You can update the renewal status at any time.
Manually renewing your hosting package:
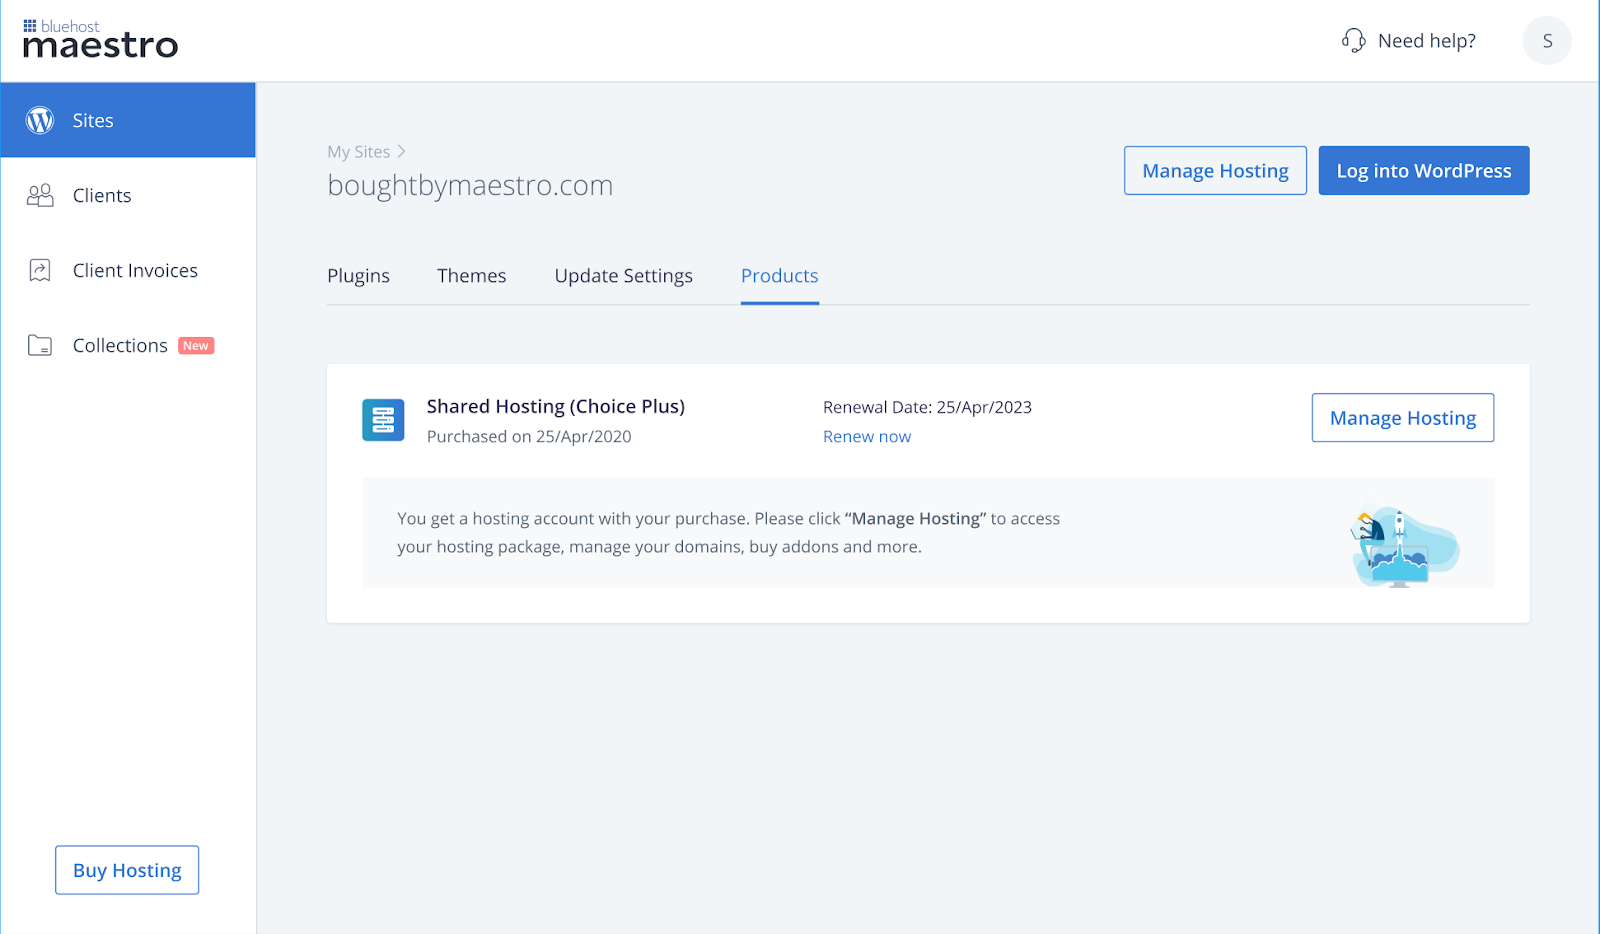
- Select the site for which you want to renew the hosting package.
- Click on Renew Now.
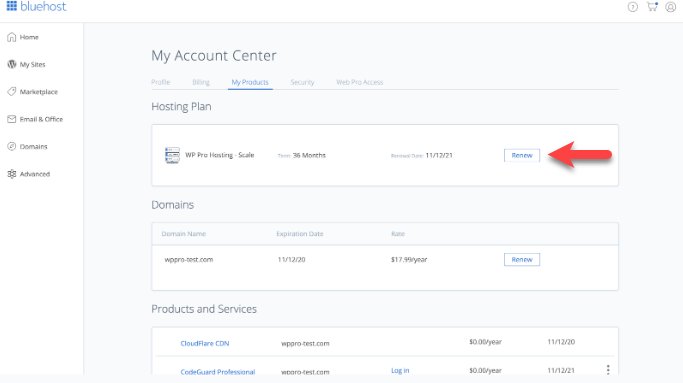
Updating the renewal status of my purchase:
- Click on Manage Purchase of the hosting package you wish to update the renewal status.

- Click on Renew of the hosting or domain which you wish to update the renewal status.
If you need further assistance, feel free to contact us via Chat or Phone:
- Chat Support - While on our website, you should see a CHAT bubble in the bottom right-hand corner of the page. Click anywhere on the bubble to begin a chat session.
- Phone Support -
- US: 210-488-5907
- International: 210-488-5907
You may also refer to our Knowledge Base articles to help answer common questions and guide you through various setup, configuration, and troubleshooting steps.

